 When did you last check your oven door gasket to see if it needs replacing?
The gasket is there to make sure your oven door seals properly so that your oven operates as efficiently as possible.
A worn-out gasket could mean an oven that has to work harder to heat to the set temperature or that takes longer to cook your food. And with Thanksgiving dinners on the horizon, now is the time to check that gasket.
When to replace your oven door gasket
How do you know if your oven door gasket needs replacing? If you’re experiencing the following issues:
- Your oven won’t heat to the right temperature;
- Food is cooking unevenly;
- Food is taking longer than it should to cook…
then a worn-out gasket is likely the culprit and a visual check will probably confirm it. If the gasket is cracked, torn, looks worn or is frayed, it should be replaced.
You can also tell that your oven has a poor seal if you can feel an unexpected amount of heat escaping from around the door.
Tip: When was the last time you cleaned your oven? While you’re checking the gasket, it might be a good time to do a thorough cleaning as well. Your owner’s manual is your best guide.
Where is the gasket?
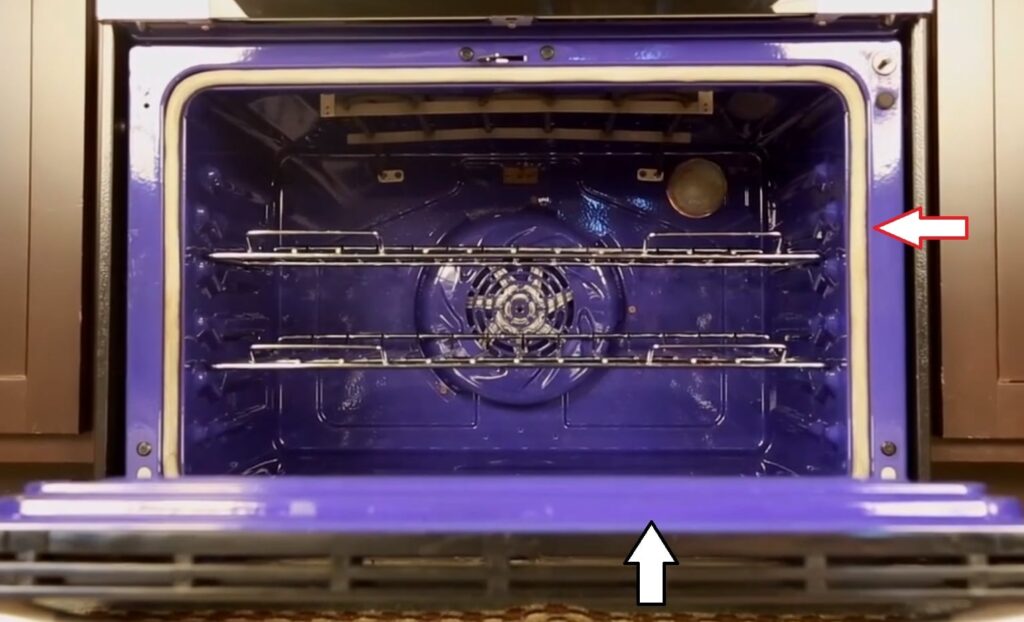
For most stoves, the oven door gasket is located in a channel either along the frame of the oven, as shown by the red arrow above, or on the door itself, as shown by the black arrow. Typically, it will be either a braided fibreglass or rubber. These types of gaskets, in these locations, are easy to replace if you follow a few simple steps.
Some ovens, however, have a door that is divided into two sections with the gasket installed in between the back and front panels of the oven door. If you have this type of oven, it’s best to call in a professional to change the gasket for you.
How to replace the oven door gasket
- Check your owner’s manual for the correct replacement gasket. Most home improvement stores will carry them or see if you can buy it online from the manufacturer.
- You will need:
* needle-nose pliers
* non-abrasive cleaner such as mild dish soap & a cloth
* possibly a screwdriver - Make sure the oven is cool. If you have an electric stove, unplug it or shut off the breaker. If you have a gas stove, shut off the gas valve.
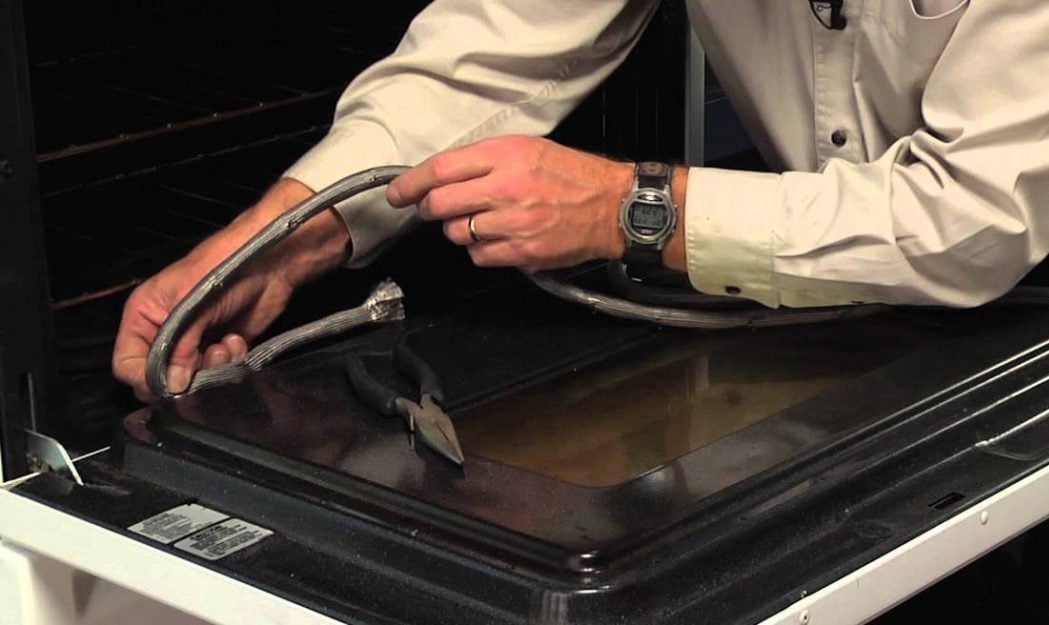
- The old hose is most likely affixed either with pins or clips that fit into small holes around the gasket, screws, or is simply form-fitted into the channel. The ends may be fed through a slightly larger hole or may be fastened with metal plates that need unscrewing. The ends are a good place to start and the gasket should detach fairly easily. If not, carefully wedge the pliers or screwdriver underneath to gently coax it out. If you break any pins or clips while removing, use the pliers to pull them out.
- Once the old gasket is removed, clean out any grease or food residue in and around the channel. Make sure the area is completely dry before installing the new gasket.
- To install the new gasket, if it is held by pins or clips, start at one end with the first pin hole and work your way around. If the gasket is form-fitted, fold the gasket in half to find the middle, place that in the centre at the top of the frame and work your way around the corners, pressing the gasket into the channel. For the ends, use the pliers to tuck them into the larger holes or to push the two ends together or screw on the metal plates.
- You can then plug the stove back in or turn the gas back on.
You may notice that the new gasket keeps the door from shutting properly at first. The gasket will become more flexible with use and you may find it helpful to lock the oven door shut overnight to encourage a better fit.
A word of caution regarding gas stoves: If at any time you smell gas, leave the house immediately, without turning anything off or on, including flashlights. Do not re-enter your home until you are given clearance by emergency workers.
Here’s a video showing how a gasket is replaced:
Originally published Sept. 17, 2018
Got a maintenance task you’re not sure how to do?
Drop us a line at info@allthingshome.ca or message us through Facebook.