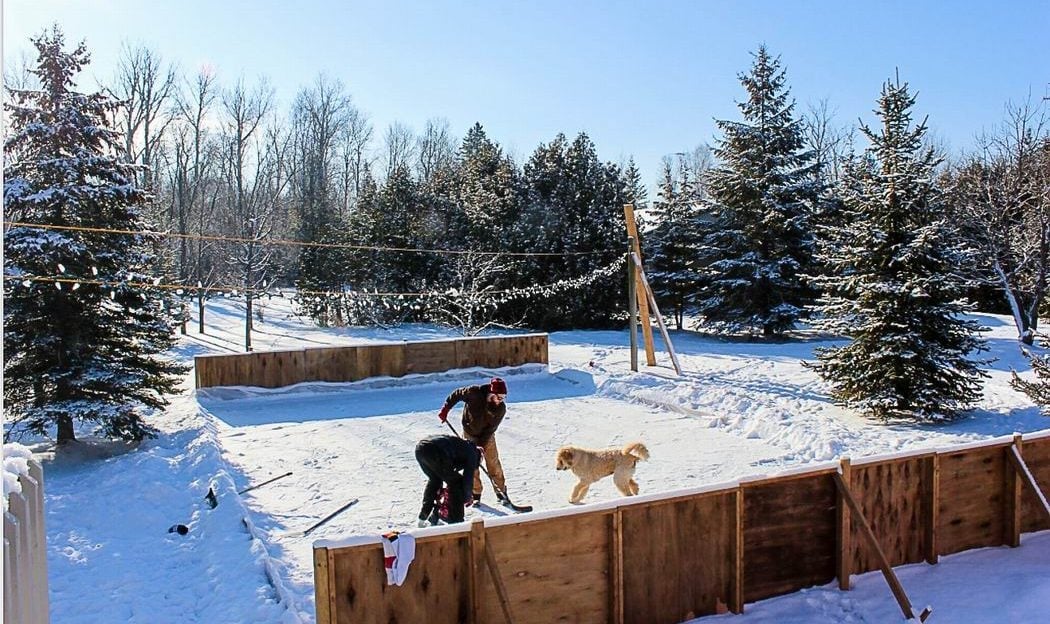
Our long winters can be tough, especially when you have kids to entertain and you’re on a budget, which is why this backyard hockey rink project is such a great one to take a stab at.
 Cost-effective and easy to achieve, building a backyard rink is something that will quickly become a much-loved tradition – one that can be repeated for many winters to come if you utilise the right materials.
This is my guide for building a 28-foot by 46-foot rink in eight easy steps. If you’re wishing you had built your own backyard rink this winter, keep this guide handy so that you can be the envy of the neighbourhood next year.
Before you start: Be sure to choose a pressure-treated wood product sturdy enough to cope with the many slap shots that are sure to hit the wood (my go-to is MicroPro Sienna).
Materials needed:
8 4’x8’x3/4” plywood – used for the end boards
24 2x4x8’ lumber – used for braces, frames the end boards
13 2x10x10’ lumber – used for skirt boards for the rink frame
1 2x10x8’ lumber – used to splice board for the rink frame
18 2x2x48” balusters – used for skirt board stakes
10 2x4x10’ lumber – used as end board bracing
2 4x4x8’ lumber – used for corner braces
4 metal post spikes
1 box 3” deck screws
1 box 2” deck screws
1 32×50′ hockey rink liner
Watch this video to see how I build the rink. (The steps involved are listed below.)
Steps:
- Find a flat space to lay the rink out. You want it to have a nice level grade to it so that when you fill it up you’ll have a level rink.
- Mark out the area for the rink using corner stakes. Putting in the spikes and then inserting the posts will help identify where to put the boards. The key factor to remember when you’re doing any survey is knowing how big your tarp is. The tarp I used was 32 x 50 feet. Keep in mind that you need to allow for excess to go over your board. If I’m using 2x10s, that means that I want two feet on each side to flap over. So, a 32×50’ tarp is actually going to make a 28×46’ rink. Once you’ve figured out your square do a quick diagonal corner to corner measure to make sure of your measurements.
- Stake four corners and run the skirt boards.
- Insert ground stakes for skirt boards.
- Install corner spikes, then run boards and splice plates Then, install corner posts into corner spikes.
- Build the end board and install, stake boards and add in bracing. Don’t forget to check that the end board is plumb before hammering in the bracing at an “X” angle.
- Lay out the rink liner and secure in place. Remember, with excess liner over the edges, you won’t have any leakage.
- Fill rink with garden hose and wait for ice to form on your epic backyard hockey rink! (Be sure to drain your hose bib after filling so your pipe won’t freeze. If you do have snow on the ground, pack it down to create a flat base for the water.)
 For great outdoor DIY inspiration and project how-to guides, visit handcraftedbychrispalmer.com and follow Chris on Instagram @handcraftedbychrispalmer.
Related
Get regular updates on our latest articles
Originally posted Jan. 25, 2018
