Ceramic tile will probably always maintain its place as one of the very best indoor flooring surfaces, but even a ceramic floor doesn’t always retain its good looks. And when problems do arise, it usually has to do with grout. That’s the stuff that fills the intentional gaps left between tiles when they were installed. But deteriorating tile grout is definitely something you can fix yourself.
Before you get busy ripping out old grout and putting in some new stuff, there are a few things you need to understand:
- Is an ugly grout colour the problem with your flooring, not physical deterioration? Light shades of grout lines can be darkened easily with paint-on grout dye, so you don’t necessarily need to replace the grout.
- Are you plagued by crumbling grout? This can certainly be fixed, as you’ll see.
- Cracked grout may be a different issue because this kind of failure probably goes beyond poor grout itself. It could be that slight movement of the tile on an inadequate subfloor or wall is the cause. And if this is the case, then the new grout will crack again in time, too. That said, regrouting is still the best way to go, at least until you’re ready to replace the tile.
MORE: Cleaning tile grout
Remove failing, old grout
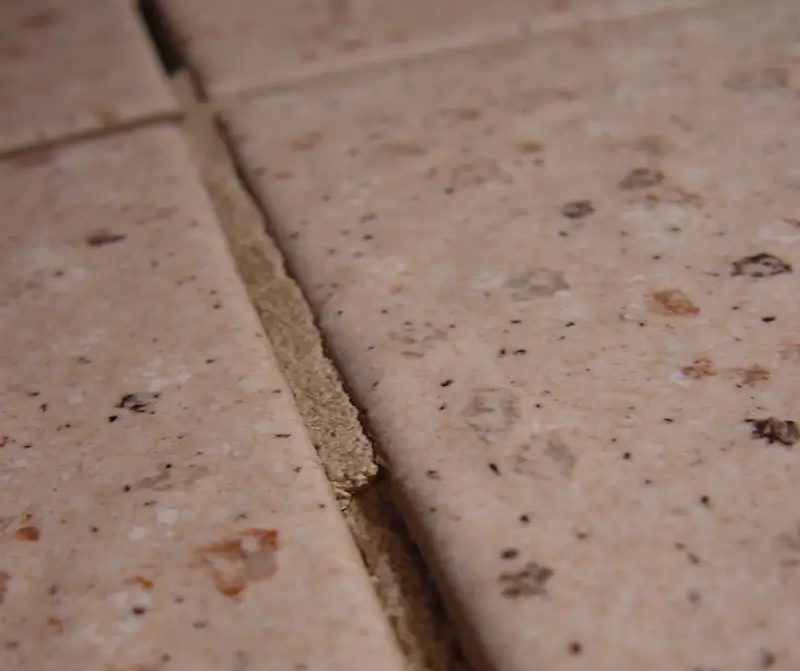
Your first step is to remove the failing old grout, and this may be easy or difficult depending on what you’ve got. Any hardware store can sell you a claw-shaped, carbide-tipped hand tool designed for scraping out old grout, and this is practical on small areas with loose grout. The photo below shows a failing grout joint I saw a few years ago in a friend’s house.
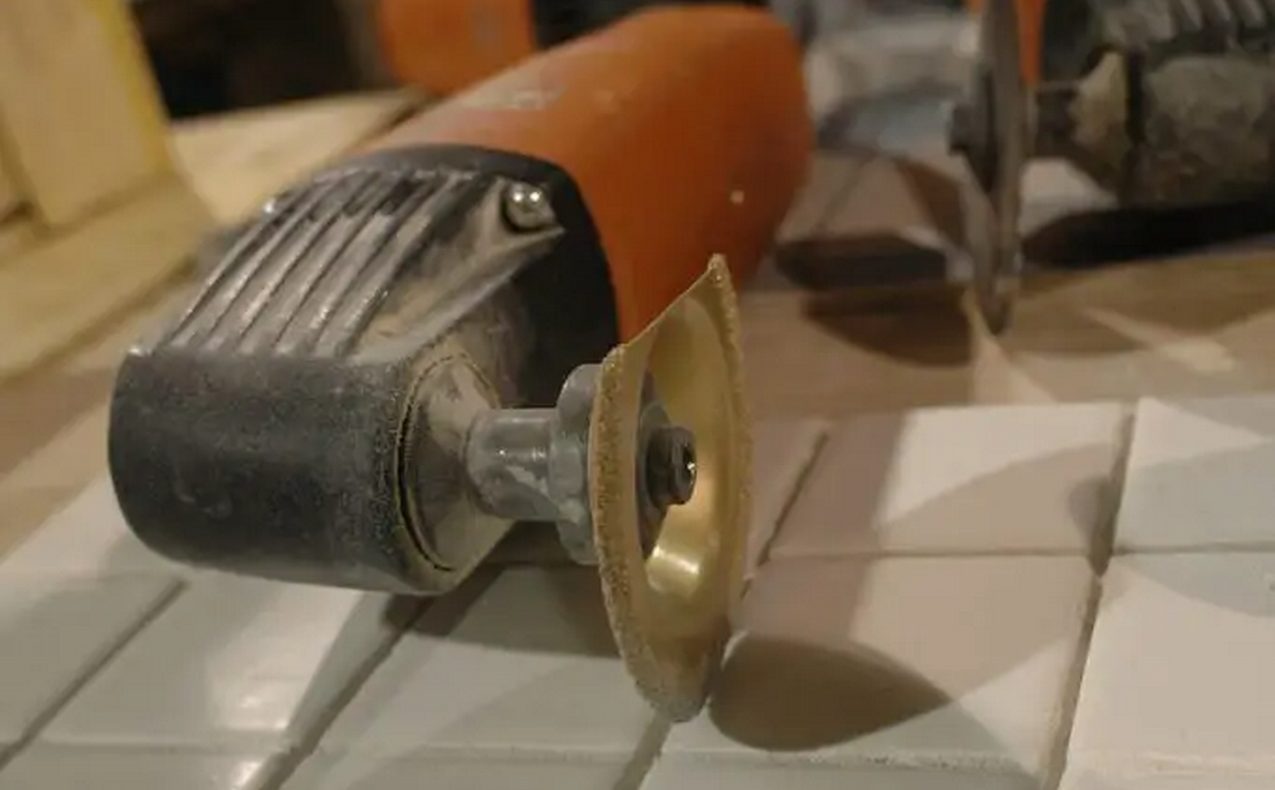
If this hand tool proves too slow or tiring, there are power tools designed to do the job. Generically called multitools, one of the most powerful I know is called the Multimaster. It’s made by a European company called Fein, and is designed for sanding, polishing and cutting. It is also made to take an abrasive attachment especially designed for grout removal. That’s it in the photo at the top of the page.
In practice, you’ll find a combination of power and hand tools does the best job of removing old grout. Work steady and don’t think about finishing. Just think about the immediate task at hand. As you work, aim to remove enough grout so there’s at least three to four millimetres of depth to accept new grout. While it’s possible to apply grout into gaps that are shallower than this, deeper is better because it boosts your chances that the new grout will bond properly and stay put.
Vacuum, vacuum, then vacuum again
When you think you’ve got all the old grout removed, vacuum the area thoroughly to remove dust and grit, then take a closer look. You’re bound to have missed a spot or two, and now’s the time to remove any old grout you missed. Vacuum again. Cleanliness is key to the adhesion of new grout, so don’t attempt to use just a broom.
Applying new grout
Ceramic tile grout comes as a powder that you mix with water. Start by mixing a batch of grout to the consistency of peanut butter. You can do this by hand with a trowel, but you’ll get smoother results more quickly using a mixing paddle spun in a handheld drill.
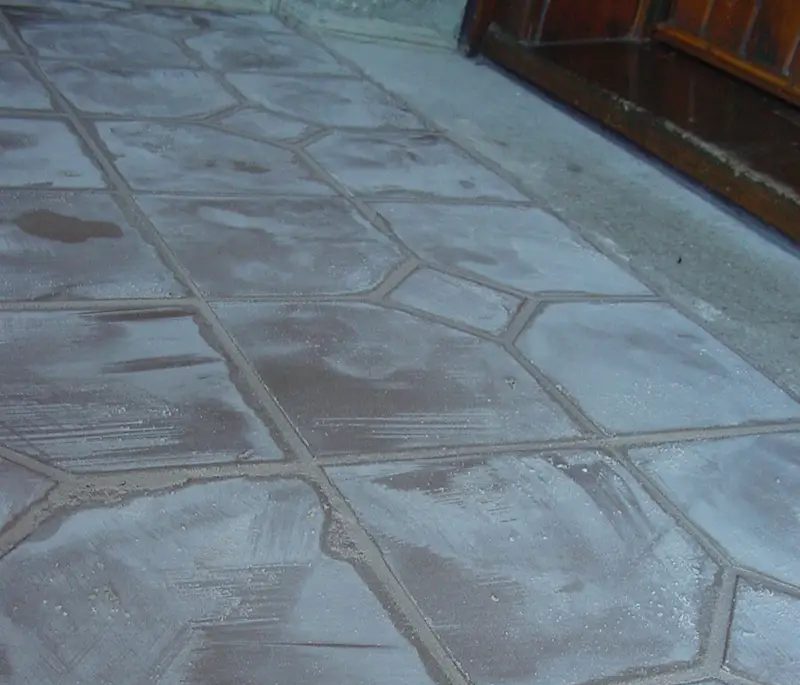
Use a wooden or rubber-edged trowel to spread grout over the tiles and into the grout gaps in a 10- or 20-square-foot area of floor. Make sure all gaps are filled, with excess grout scraped off the surface. What you’ll have at this stage is a dirty looking floor, but one that’s almost done. The photo below shows the grout applied and wiped off superficially, but still needing final wiping.
Wait for five minutes and gently wipe the tiles (including over a grout joint) with a damp sponge. What you’re looking for is grout that’s partially hard, but still soft enough to be wiped cleanly off the tiles. If more than a tiny bit of the grout comes out of the joint, wait a while longer and try again. When the grout is firm enough to clean properly, wipe and rinse your sponge often as you work. It may take six or eight passes before the tiles are completely clean.
Leave the area alone for a day or two, then open it up to full traffic. You’ll be amazed how much new grout can improve the look of your home.